ETJava Beta | Java
 注册
登录
注册
登录
注册
登录
注册
登录
集群配置 最少需要两台设备,这里我们使用两台虚拟机来模拟
1. 修改es的配置文件
# ---------------------------------- Cluster -----------------------------------
#
# Use a descriptive name for your cluster:
#集群的名称 多个集群使用相同的名称 否则找不到
cluster.name: my-application
#
# ------------------------------------ Node ------------------------------------
#
# Use a descriptive name for the node:
# 配置集群节点名称 每个节点的名称都是唯一的
node.name: node-1
#
# Add custom attributes to the node:
#
#node.attr.rack: r1
# ----------------------------------- Paths ------------------------------------
#
# Path to directory where to store the data (separate multiple locations by comma):
# 使用默认路径 在es目录下的data目录中
#path.data: /path/to/data
#
# Path to log files:
#
#path.logs: /path/to/logs
#
# ----------------------------------- Memory -----------------------------------
#
# Lock the memory on startup:
#
#bootstrap.memory_lock: true
#
# Make sure that the heap size is set to about half the memory available
# on the system and that the owner of the process is allowed to use this
# limit.
#
# Elasticsearch performs poorly when the system is swapping the memory.
#
# ---------------------------------- Network -----------------------------------
#
# Set the bind address to a specific IP (IPv4 or IPv6):
# 配置允许通过ip远程访问
network.host: 192.168.199.126
#
# Set a custom port for HTTP:
# 配置端口
http.port: 9200
#
# For more information, consult the network module documentation.
#
# --------------------------------- Discovery ----------------------------------
#
# Pass an initial list of hosts to perform discovery when new node is started:
# The default list of hosts is ["127.0.0.1", "[::1]"]
# 将当前节点作为主节点
discovery.zen.ping.unicast.hosts: ["192.168.199.126"]
#
# Prevent the "split brain" by configuring the majority of nodes (total number of master-eligible nodes / 2 + 1):
#
#discovery.zen.minimum_master_nodes:
#
# For more information, consult the zen discovery module documentation.
#
# ---------------------------------- Gateway -----------------------------------
#
# ---------------------------------- Various -----------------------------------
#
# Require explicit names when deleting indices:
#
#action.destructive_requires_name: true
#
# head插件连接问题解决
http.cors.enabled: true
http.cors.allow-origin: "*"
选中要克隆的虚拟机右键 -> 管理 -> 克隆
弹出窗中选择从虚拟机的当前状态 下一步时选择完整克隆
等待克隆完成后 需要修改ip地址
vim /etc/sysconfig/network-scripts/ifcfg-ens33
修改完成后需要重启网络
sudo service network restart
需要修改两个地址
1. 节点名称 唯一的 不能与其他节点重名
2. 修改当前节点的连接IP地址 要与当前机器的IP相同 否则集群时找不到该节点

# ------------------------------------ Node ------------------------------------
#
# Use a descriptive name for the node:
# 配置集群节点名称 每个节点的名称都是唯一的
node.name: node-2
# ---------------------------------- Network -----------------------------------
#
# Set the bind address to a specific IP (IPv4 or IPv6):
#
network.host: 192.168.199.127
启动之前需要删除 /home/es6/elasticsearch-6.2.4/data/nodes目录 否则集群会建立失败
注意:每个节点都需要删除nodes目录
启动前还需要切换用户 不能使用root启动
启动顺序: 先启动主节点 在启动从节点
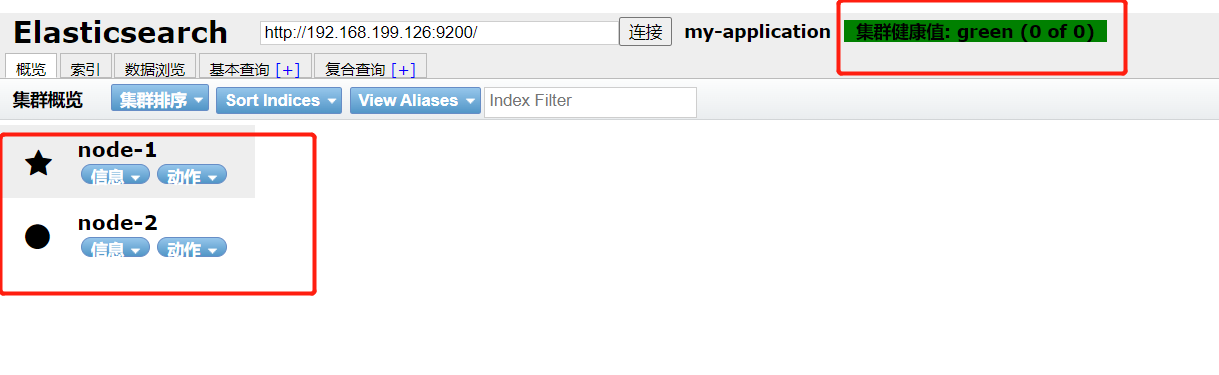
启动完成后可通过head插件进行验证
另外:我们之前创建的索引数据都是保存在nodes目录中的
 官方公众号
官方公众号
