ETJava Beta | Java
 注册
登录
注册
登录
注册
登录
注册
登录
当根据Cloud Service (Extended Support) 文档更新证书 ( https://docs.azure.cn/zh-cn/cloud-services-extended-support/certificates-and-key-vault )时,如果遇见旧的证书(如中间证书,根证书)信息保存在Key Vault Secret中,而更新的时候,只能从Key Vault证书中匹配到服务器证书(叶子证书)时。 而中间证书,根证书会出现如下错误:
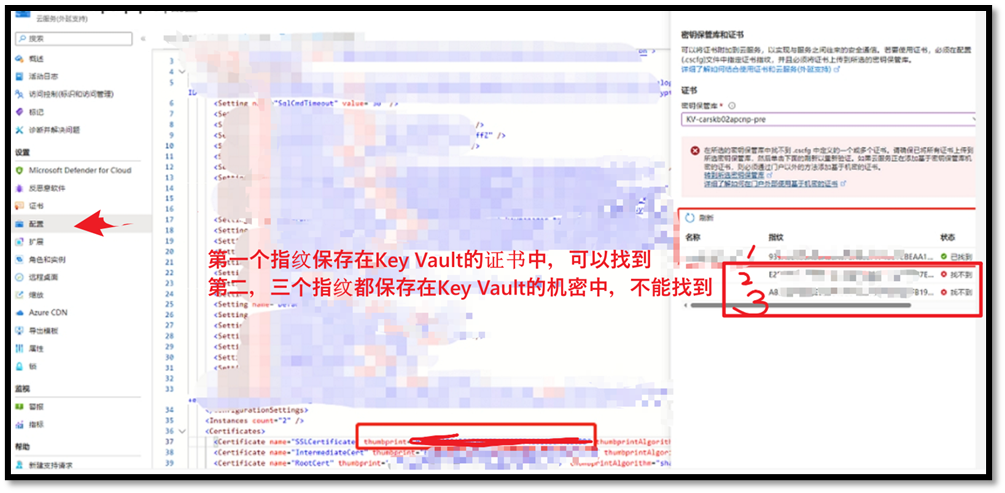
出现错误信息为:
在所选密钥保管库中找不到 .cscfg 中定义的一个或多个证书。请确保已将所有证书上传到所选密钥保管库,然后单击下面的刷新以重新验证。如果云服务正在添加基于密钥保管库机密的证书,则必须通过门户以外的方法添加基于机密的证书。
Go to the selected key vault
Learn more about using secret based certificates outside of the portal
而在提示的文档中,可以找到这句话
“但如果计划将证书用作机密,则无法验证这些证书的指纹,并且通过门户进行的任何涉及添加机密的更新操作都会失败。”
“ 建议客户使用 PowerShell 或 RestAPI 继续进行涉及机密的更新。”
本文将介绍如何使用REST API来更新证书!
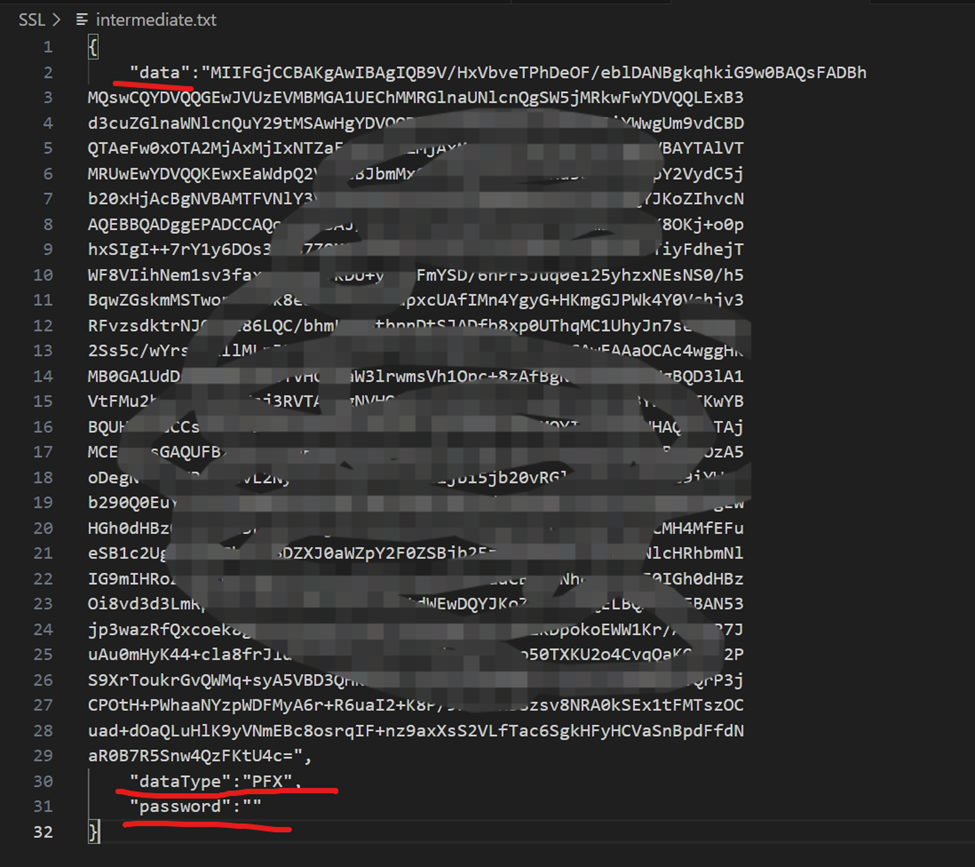
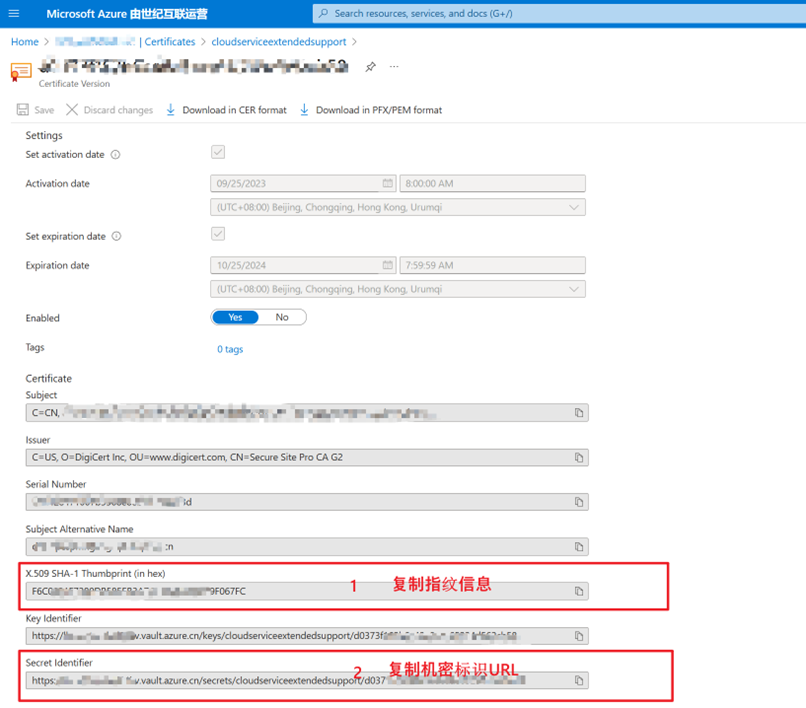
根据证书文档步骤(https://docs.azure.cn/zh-cn/cloud-services-extended-support/certificates-and-key-vault#upload-a-certificate-to-key-vault) ,把PFX证书上传到Key Vault中,然后复制出证书的指纹信息和机密标识:
| { "data": "Your base64 certificate", "dataType": "PFX", "password": "optional, 如有密码则填入密码" }
如: |
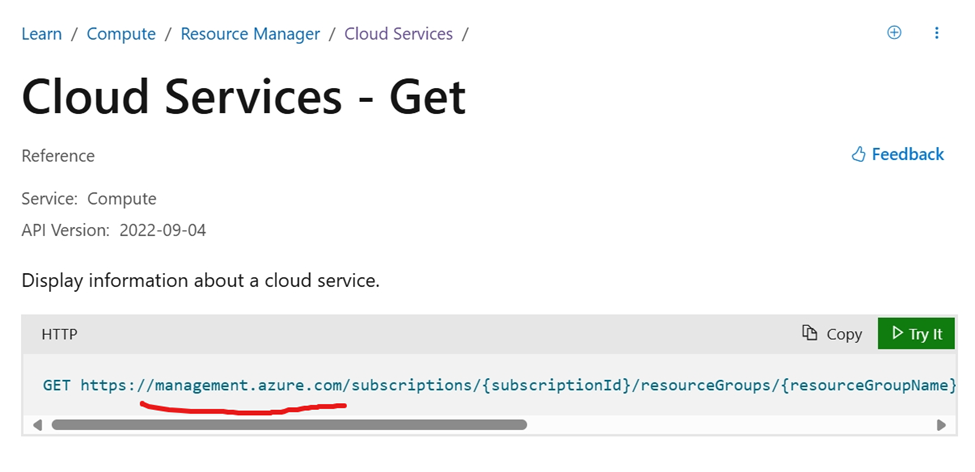
注意,在中国区需要修改Host Endpoint为:management.chinacloudapi.cn
GET https:// management.chinacloudapi.cn /subscriptions/{subscriptionId}/resourceGroups/{resourceGroupName}/providers/Microsoft.Compute/cloudServices/{cloudServiceName}?api-version=2022-04-04
需要携带Authorization Token,否则会获得如下错误:
{
  "error": {
    "code": "AuthenticationFailed",
    "message": "Authentication failed. The 'Authorization' header is missing."
  }
}
获取Token的方式可以通过浏览器访问Cloud Service(Extended Support)门户,然后通过开发者工具(F12)查看网络请求,从访问Cloud Service的请求头中获取Authorization内容。或者通过az cli获取token
az cloud set --name AzureChinaCloud

az login

az account get-access-token --scope "https://management.core.chinacloudapi.cn/.default" --query accessToken
当成功获取到Cloud Service的信息后,调整 JSON内容:删除Properties中,除了configuration 和 osProfile 外的全部内容。
整理之后JSON格式如下:
{
  "name": "cloud service extended support name",
  "id": "cloud service (extended) support resource id",
  "type": "Microsoft.Compute/cloudServices",
  "location": "chinanorth3",
  "properties": {
    "configuration": "{ServiceConfiguration}",
    "osProfile": {
      "secrets": [
        {
          "sourceVault": {
            "id": "key vault resource id"
          },
          "vaultCertificates": [
            {
              "certificateUrl": "key vault Secret Identifier"
            },
            {
              "certificateUrl": "key vault Secret Identifier"
            },
            {
              "certificateUrl": "key vault Secret Identifier"
            }
          ]
        }
      ]
    }
  }
}
需要修改的地方有两处:
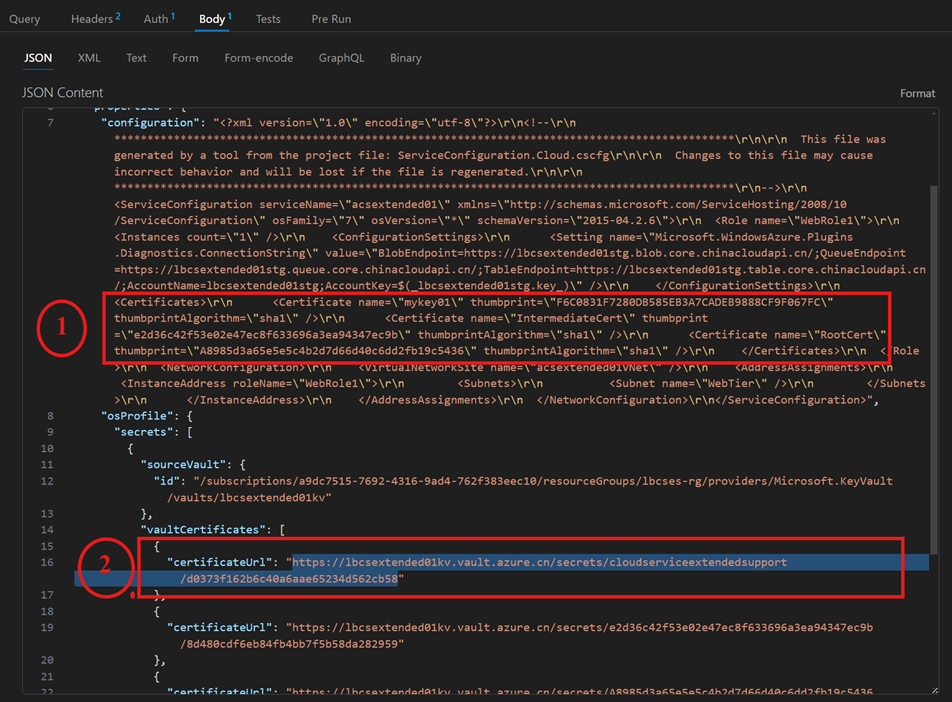
1)configuration内容中Certificates指纹,用第一步中的指纹值替换文件中需要修改的内容
2)osProfile.secrets中certificateUrl值,用第一步中的机密标识URL来替换旧的certificateUrl
准备好以上的内容后,既可以进行第三步,发送PUT请求把新证书更新到Cloud Service(Extended Support)
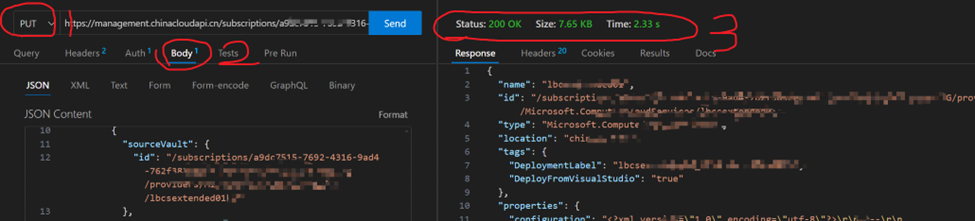
使用第二步中同样的URL,把请求类型修改为PUT,然后把第二步修改的JSON放入Request Body。点击发送,查看请求的状态。
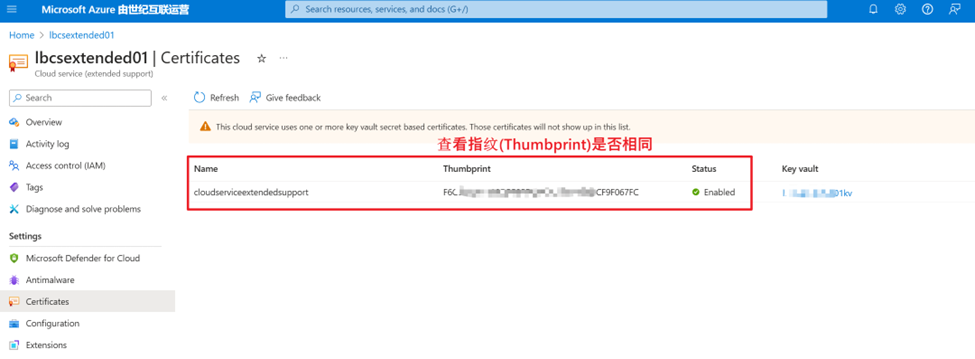
同时,可以回到Cloud Service (Extended Support) Azure门户页面,查看证书是否成功修改。
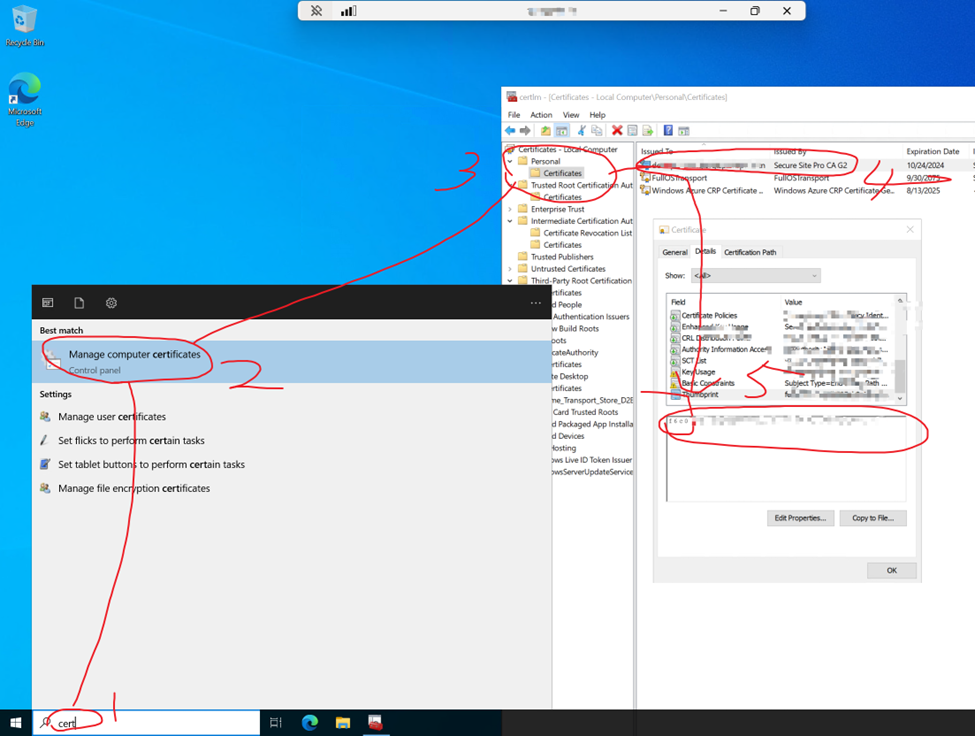
同时,更深入的验证是通过RDP到云服务的节点中,查看证书信息!
RDP --> 输入“cert” --> 选择“Manage Computer Certificates” --> 查看 Pernonal Certificates
【END】
 官方公众号
官方公众号